
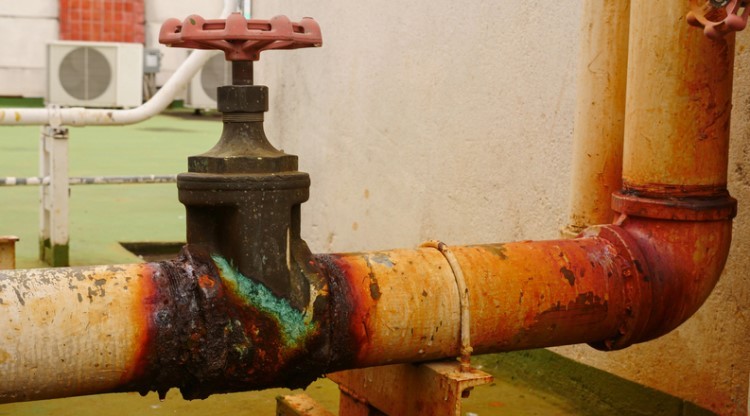
The Colorado River has been eroding a path through the Grand Canyon for about 5 million years, to create a beautiful natural scene. However, what isn’t a pretty sight is a valve worn down by corrosion! Over time, fluid moving through valves corrodes them by means of flashing and cavitation. It’s important to deal with these problems because doing so will extend the lifespan of your equipment.
Keep reading to find out how flashing in valves happens, how it’s different from cavitation, and what you can do about it.
Flashing in Valves
Flashing in control valves occurs when the fluid running through it turns into vapor in the control valve. This results in a choked flow and slows down the fluid. To consider something a flashing application, the downstream pressure needs to be lower than the vapor pressure, or (P2 > PV).
The vapor pressure is the amount of pressure at which a liquid will turn into a vapor. The temperature stays the same, but the pressure changes, which causes flashing. The inverse, where the pressure stays the same but the temperature changes, is what causes boiling!
Fluids have to accelerate when they reach a smaller flow area, in order to maintain its volumetric flow rate. If bubbles occur, they get in the way and reduce the flow rate. This can happen regardless of the type of fluid – even water can cause flashing damage. It damages the valve when the vapor carries the liquid and the liquid acts like a solid particle when it hits the surface of the valve.
The valve itself cannot prevent flashing, because flashing is caused by application conditions and fluid properties. The factors that influence flashing include the flow rate, the fluid viscosity, pressure drops, how corrosive the fluid is, and body geometry. However, there are things you can do to minimize the intensity of it and to minimize the damage to your valves.
Cavitation in Valves
Cavitation and flashing are two parts of the same phenomenon. If a higher level of pressure is restored after flashing occurs, the bubbles will violently collapse and cause shock waves in the system. Streams of fluid will act as micro jets and hit the surface of the valve at high velocity. This causes pitting of the body and trim of the valve. Additionally, the more this happens, the more susceptible the valve will become to this same type of damage. Cavitation can even damage surrounding equipment, due to the vibrations it causes.
How to Detect It
You can inspect a valve to look for visual signs of the presence of flashing. Generally, the material of the valve will look smooth and shiny, because it has been worn down. Cavitation produces slightly different signs, as the valve will look pitted or gouged.
You can also listen for auditory evidence while the machinery is in operation. Flashing is sometimes described as a hissing noise, or like sand flowing through the valve. Meanwhile, cavitation may sound like popping, or like gravel flowing through the valve. You may be familiar with having to listen to your pipes at home to detect a water pressure problem with a flash shower rough in valve. Lots of gurgling or spitting sounds are usually a bad sign. With industrial processes, you don’t need to worry about listening very closely, because these noises can be as loud as a snowblower!
Solutions to Flashing
There are a variety of ways to reduce flashing damage. One way is to increase the size of the valve to reduce the velocity of the outlet flow. A few other ways are to prevent or reduce particle impact with valve surfaces, to use materials that are as hard and durable as possible, and to lower the velocity of the erosive flow.
It can also help to choose a valve with fewer fluid direction changes. This results in fewer particle impacts to the surface material of the valve. Additionally, there are two types of controls you can implement that will help reduce this problem.
System Level Controls
Place the valve in a high-pressure area. This makes it less likely that the fluid pressure will fall low enough for flashing to happen. You can achieve this by putting the valve as far upstream as possible. You can use downstream restriction devices like an orifice plate or a second valve to increase the backpressure. It’s important to note that this is only recommended for on-off service. Cavitation may still be a problem at the downstream device.
Another way is to introduce noncondensable gas. This can prevent the violent collapse of bubbles in processes that can tolerate a gas.
Control Valve Level Controls
For control valve level controls, it’s paramount to use materials that will minimize damage. The best materials for a flash rough in valve are those that are hard and corrosion-resistant.
You can also try using anti-cavitation trim design. These work in a variety of ways, such as pressure drop staging, tortuous path treatment, dividing the flow into multiple paths, and redirecting the flow away from the surface of the valve.
Durable Materials to Prevent Flashing Damage
Given the damage flashing and cavitation can cause to your valves, one of the best ways to mitigate it is to use valves that are made from extremely durable materials.
Take control of flashing in valves by contacting Everlasting Valves. Everlasting Valves designs products for the toughest industrial applications so that you can be confident that they will last a long time.